Glitter Balloon Bouquet
- cardtheraphy51
- Aug 26, 2023
- 2 min read
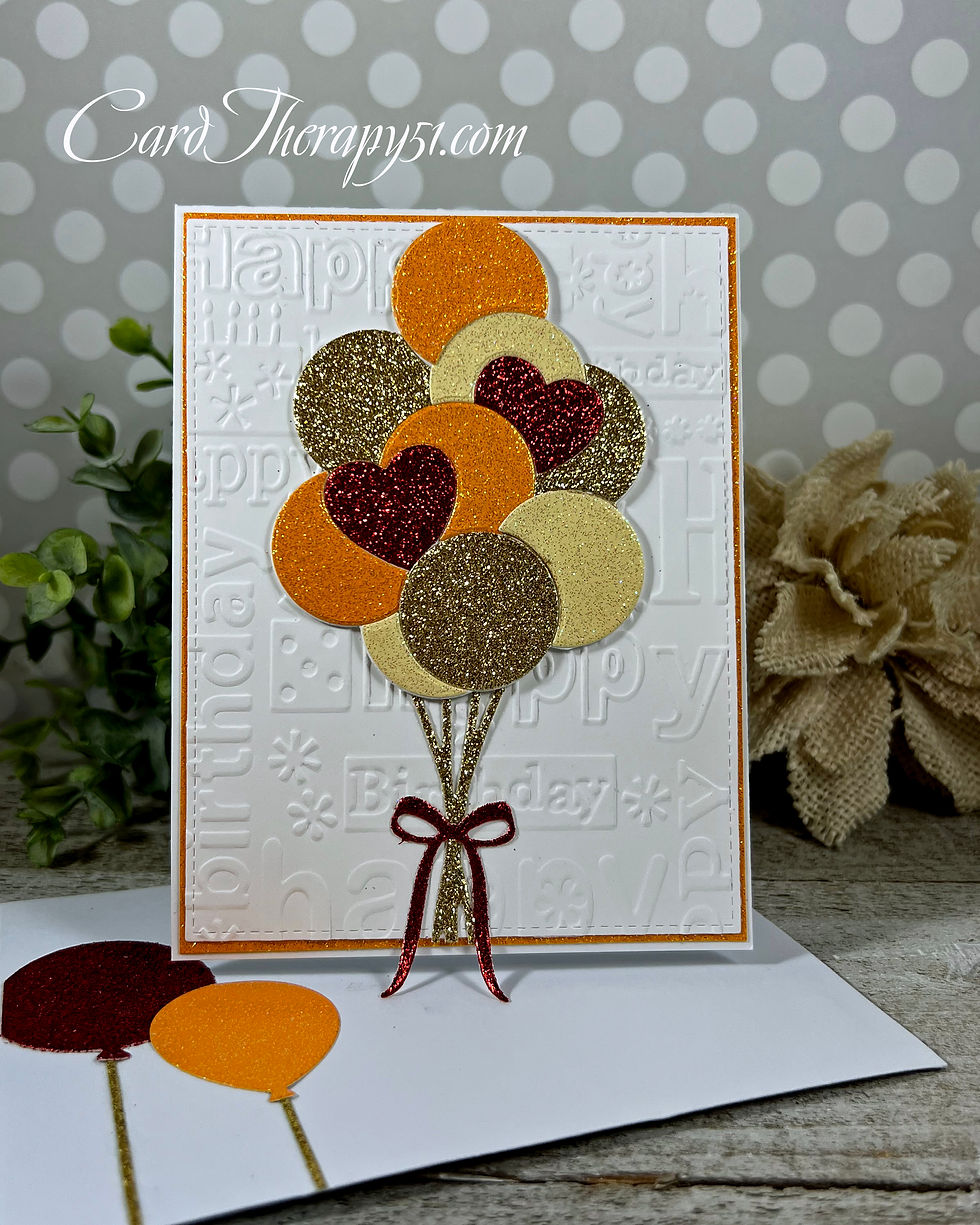
I had one more die that I recently purchased from Papertrey Ink. I decided to use the same color scheme that I had used on my previous cards and pulled out colored glitter in orange, yellow, red, and gold.
This die cuts the entire balloon bunch as one piece. It also has individual dies that fit into the etched markings on the bouquet where the different balloons should be adhered.
I knew I wanted the heart balloons to be red. I didn't want the same color balloons to be side by side, so I took a pencil and wrote the colors I wanted to use on each balloon and then cut the coordinating die from the right color cardstock. They piece together easily and the results was a very glittery balloon bouquet.
The strings of the balloon were cut from gold glitter cardstock and the balloon bouquet was adhered in place with liquid glue. To help it stay in place a little of Scotch Tape was added to the back over the top of the strings. The bow was cut from red cardstock and adhered in place with liquid glue as well. A heavy block was placed on top until it dried.
A panel of white cardstock was cut down with stitched rectangle die and then dry embossed with the Cuttlebug Happy Birthday Embossing Folder. I decided to let this background be the sentiment to the card. The panel was framed with some orange cardstock that 1/8" larger than the embossed panel and adhered to a top folding A2 cardbase. Low loft foam tape was added to the back of each balloon. The backing paper was remove and liquid glue was added to the balloon strings and then the entire bouquet was adhered to the front of the embossed panel.

PRODUCTS USED:
· Papertrey Ink Balloon Bouquet
· Cuttlebug Happy Birthday Embossing Folder
· Doodlebug Designs Red, Orange, Yellow Glitter Cardstock
· American Crafts Gold Glitter Cardstock
· Limited Papers Accent Opaque White 120# Cover Cardstock
· Hammermill Premium Color 100# White Cardstock
· Nuvo Deluxe Adhesive
· Sookwang ½” Double-Sided Tape
· Simon Says Stamp Big Mamma Foam Tape


Comments